前回までは
- Arduino + node.js + expressでBME280のデータを取得し、APIサーバーとして動作させてアクセスがあったらデータ渡し。
- node.js + Vue.js+axiosで上のAPIサーバーにデータをGet要請、取得したデータをとりあえず表示
ここまで行きました。
次は綺麗に表示させたいです。
ここのサイトに書かれている表示方法がなんかかっこいいです。 www.monster-dive.com
真似してみます。。。
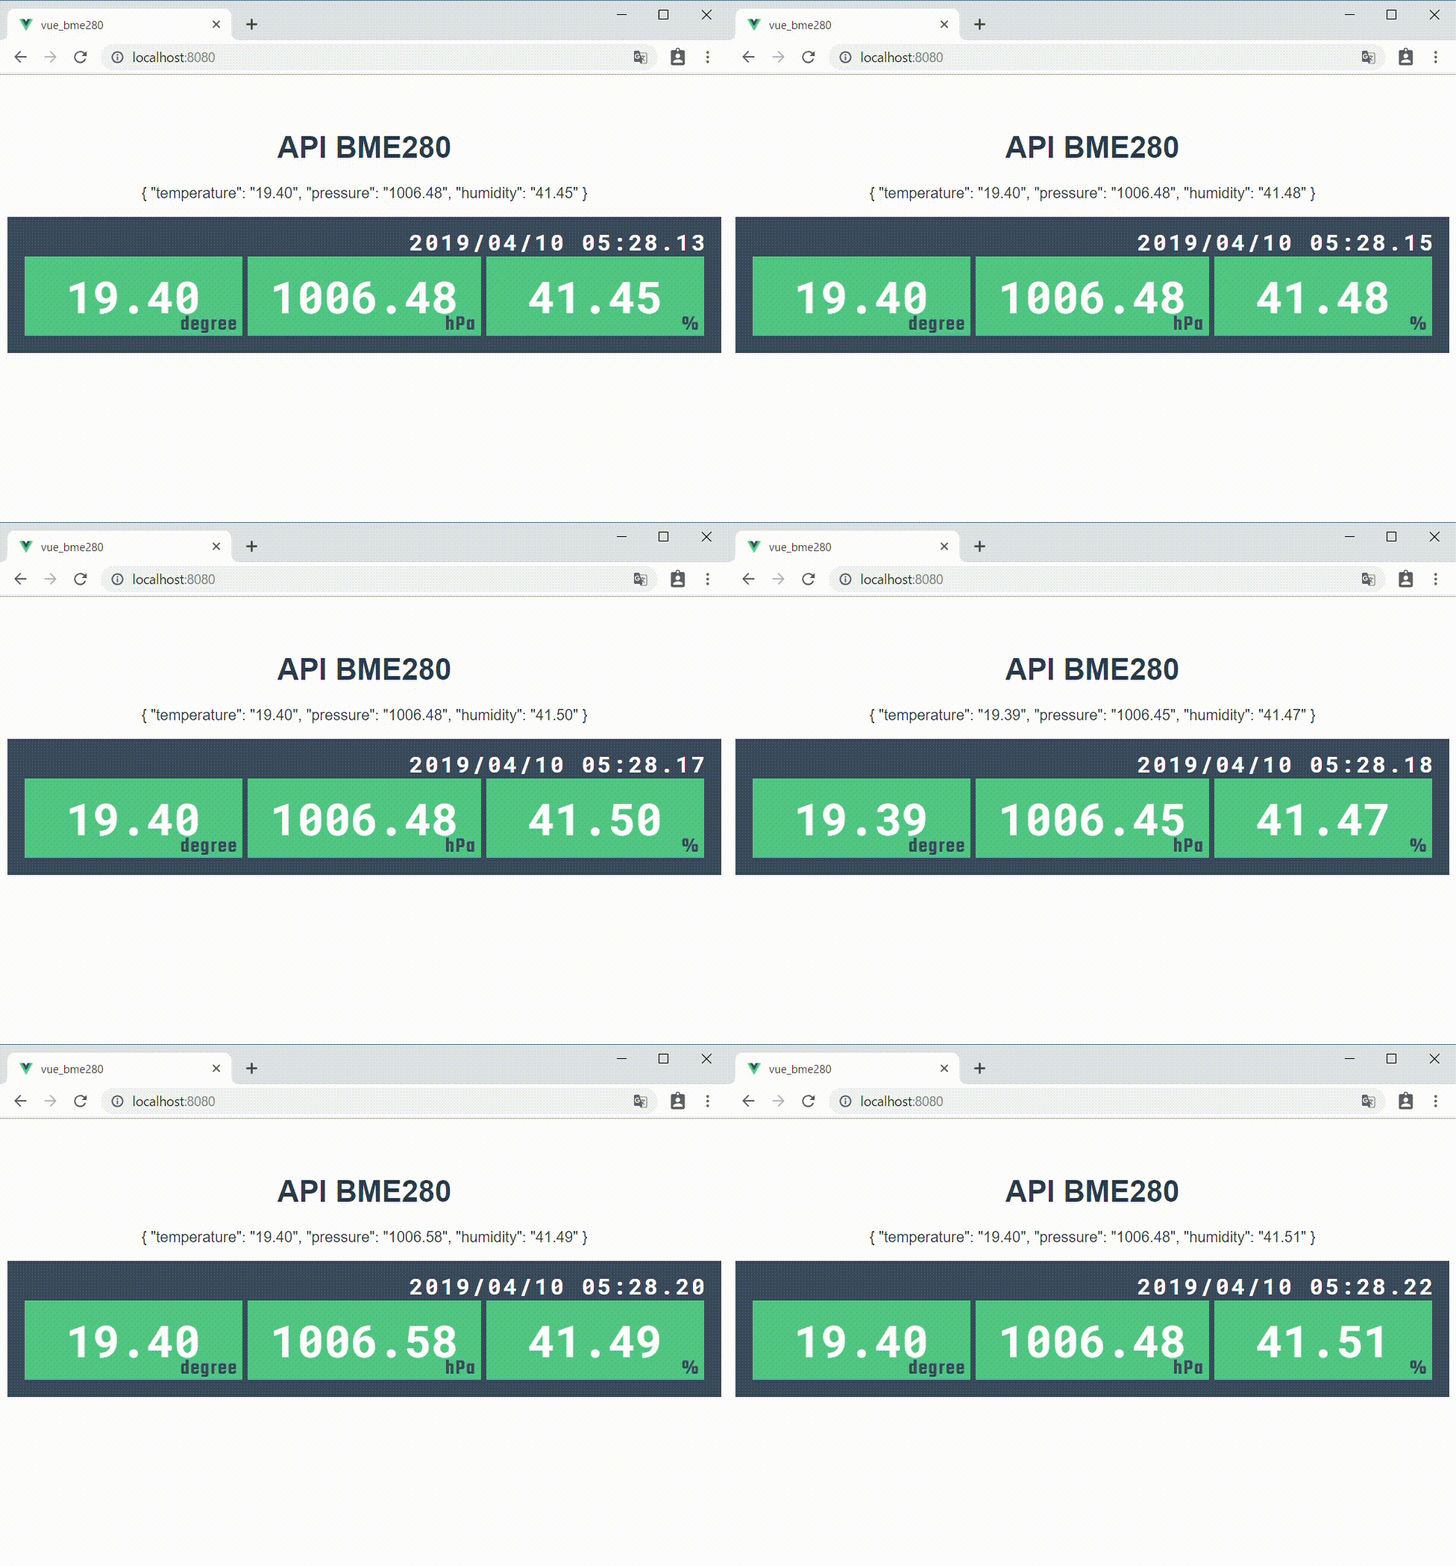
こんな感じに

おおーっ! かっこいいっす。 私のデザインセンスじゃこんなにはならないです。素晴らしいです。 パクりすぎですが。。。
ソースコード
前回までのコードはここです。APIサーバーよりデータをとってきてそのまま表示でおしまいでした。
今回は定期的にデータをとってきてかっこよくデータを表示します。
表示部分のBme280Api.vueを修正します。
<template>
  <div class="bme280api">
    <h1>{{ msg }}</h1>
    <p>{{info}}</p>

    <div class="container">
      <p class="date">{{ year }}/{{ month }}/{{ day }} {{hours}}:{{minutes}}.{{seconds}}</p>
      <div class="data280">
      <p class="data280-item temp-degree">{{tempData}}</p>
      <p class="data280-item press-hpa">{{pressureData}}</p>
      <p class="data280-item humid-percent">{{humidityData}}</p>
      </div>
    </div>

  </div>
</template>

<script>

const zeroPadding = (num, digit) => {
  return (Array(digit).join("0") + num).slice(-digit)
}

export default {
  name: 'Bme280Api',
  props: {
    msg: String,
    info: {},
    date: null
  },
  computed:{
    tempData: function(){
      return this.info.temperature;
    },
    pressureData: function(){
      return this.info.pressure;
    },
    humidityData: function(){
      return this.info.humidity;
    },
    year() {
      return this.date.getFullYear()
    },
    month() {
      return zeroPadding(this.date.getMonth() + 1, 2)
    },
    day() {
      return zeroPadding(this.date.getDate(), 2)
    },
    hours() {
      return zeroPadding(this.date.getHours(), 2)
    },
    minutes() {
      return zeroPadding(this.date.getMinutes(), 2)
    },
    seconds() {
      return zeroPadding(this.date.getSeconds(), 2)
    },
  }
}
</script>

<!-- Add "scoped" attribute to limit CSS to this component only -->
<style scoped>
h3 {
  margin: 40px 0 0;
}
ul {
  list-style-type: none;
  padding: 0;
}
li {
  display: inline-block;
  margin: 0 10px;
}
a {
  color: #42b983;
}

.container {
  background-color: #3a4a5e;
  padding: 2%;
}


.date {
  text-align: right;
  color: #fff;
  font-family: 'Roboto Mono', monospace;
  font-size: 1.5rem;
  letter-spacing: .1em;
  margin: .0em 0;
  line-height: 1;
}


.data280 {
  display: flex;
}


.data280-item {
  display: flex;
  justify-content: center;
  align-items: center;
  flex: 1 1;
  height: 85px;
  position: relative;
  z-index: 1;
  padding: 0.5em;
  margin: 3px;
  color: #fff;
  font-family: 'Roboto Mono', monospace;
  font-size: 3rem;
  line-height: 1;
  background-color: #48b883;
  box-sizing: border-box;
}


.data280-item:before {
  position: absolute;
  right: 5px;
  bottom: 1px;
  z-index: 1;
  color: #3a4a5e;
  font-family: 'Teko', sans-serif;
  font-size: 1.4rem;
  letter-spacing: .05em;
}


.temp-degree:before {
  content: "degree";
}


.press-hpa:before {
  content: "hPa";
}


.humid-percent:before {
  content: "%";
}

</style>
scriptの大きな変更点は取得時間を表示しますのでプロパティに"date"を追加しています。あとはmonster driveさんのブログに書かれていたdateを分解するスクリプトを追加しています。"template"と"style"はかっこよく表示するために変更・追加です。
次にApp.vueの変更です。
<template>
  <div id="app">
    <Bme280Api msg="API BME280" :info="info" :date="date"/>
  </div>
</template>

<script>
import Bme280Api from './components/Bme280Api.vue'
import axios from 'axios'
import { setInterval } from 'timers';

export default {
  name: 'app',
  components: {
    Bme280Api
  },
  data () {
    return {
      info: "",
      date: new Date()
    }
  },
  mounted () {
    this.getBme280()
    setInterval(() => this.getBme280(), 1000)
  },
  methods: {
    getBme280() {
    axios
      .get('http://localhost:3000/api/bme280')
      .then(response => (this.info = response.data));
    this.date = new Date()
    }
  },
}
</script>

<style>
#app {
  font-family: 'Avenir', Helvetica, Arial, sans-serif;
  -webkit-font-smoothing: antialiased;
  -moz-osx-font-smoothing: grayscale;
  text-align: center;
  color: #2c3e50;
  margin-top: 60px;
}
</style>
"template"の変更点はBme280Api.vueに"info"に加えて"date"を送り出しています。"script"の追加は定期的にデータをAPIから取得するために"timers"をimportしています。 これを使って1秒ごとに"mothods"のgetBme280()関数を呼び出しています。この関数のなかで"info"と"date"にデータをセットしています。
おっとそれからwebフォントを使っていて(webフォントって知らなかったんですが勉強になりました)"index.html"から取り込んでいます。
<!DOCTYPE html>
<html lang="en">
  <head>
    <meta charset="utf-8">
    <meta http-equiv="X-UA-Compatible" content="IE=edge">
    <meta name="viewport" content="width=device-width,initial-scale=1.0">
    <link rel="icon" href="<%= BASE_URL %>favicon.ico">
    <link href="https://fonts.googleapis.com/css?family=Roboto+Mono:700|Teko:600" rel="stylesheet">
    <title>vue_bme280</title>
  </head>
  <body>
    <noscript>
      <strong>We're sorry but vue_bme280 doesn't work properly without JavaScript enabled. Please enable it to continue.</strong>
    </noscript>
    <div id="app"></div>
    <!-- built files will be auto injected -->
  </body>
</html>
"https://fonts.googleapis.com..."のところですね。
ソースコードまとめ
今回のソフトは以下にあります。Tagは"V0.1"になっています。
次は
次はグラフの表示に挑戦したいと思います。